After the first walk, your friends will tell you what they think is wrong and make specific comments (that's how it should be!). Then run again, but already trying to improve the comments made. As practice shows, the method works from the first minutes. Of course not to 100%, but the effects are already visible.
- Worn soles in shoes – what to do?
- Buy new shoes with strong (thick) soles.
- What the wear norm should be (main photo)
- Shoes versus asphalt: Why do the soles wear out so quickly?
- Everyone knows this phenomenon: you buy a new pair of shoes, wear them for a month or two, look at the soles and they are no thicker than a sheet of paper. And then you are spoiled for choice: repair it or throw it in the trash can. In this article we will tell you why this is the case and how you can protect your shoes and prevent the sole from washing out quickly.
- Poor quality of materials
- Waste
- How to repair a hole in the sole of a shoe
- How do you glue a trainer toe?
- gait
- DIY shoemaker. How to Repair a Cracked Sole – DIY – March 19 – 43419184004 – MirTesen Media Platform
- Bone in big toe
- How to repair the top of sneakers
- Sole repairs
- Restoration of a chipped sole
- Why do the soles turn yellow?
- How to clean soles at home?
- Ineffective methods of treating slippery shoes
- Summarized. How to make a non-slip sole in winter boots? Which shoes should you choose?
- How else do I clean the white soles of sneakers and sports shoes?
- Paint remover
- Stain remover or bleach
- Acid cleaner
- Vinegar
- Final tips
Worn soles in shoes – what to do?
Have you bought new, expensive shoes and the heel is already worn out? Or worse, it's not the heel that's worn out, but the area of the foot below the toes? You keep looking at your new 'dead shoes' and googling in frustration - ''The sole of the shoe is worn out.'. OFFICEPLANKTON has heard you and there is a way out of the dilemma!
On the one hand, it's good that you're not alone, but on the other hand, it's bad that the problem is... of shoe sole abrasion is a current and unfortunately widespread problem. It is difficult to find a 100%ige solution to this problem.But we found them!
Buy new shoes with strong (thick) soles.
Many men who have problems walking are surprised after a month: 'Which shoe doesn't wear out?'But we will be disappointed - if you try hard enough, every shoe will wear out!
A proven method of dealing with worn soles – Buy new shoes. But, unfortunately, the prices for quality shoes are simply not pleasing, and the money is not small.
The 'deadliest and most capricious' soles are made of leather, the most resistant are made of rubber and dainite. The leather sole is capricious because it requires strict attention, it has contraindications to wear. For example, in rainy weather you should leave such shoes at home and wear shoes with rubber soles.
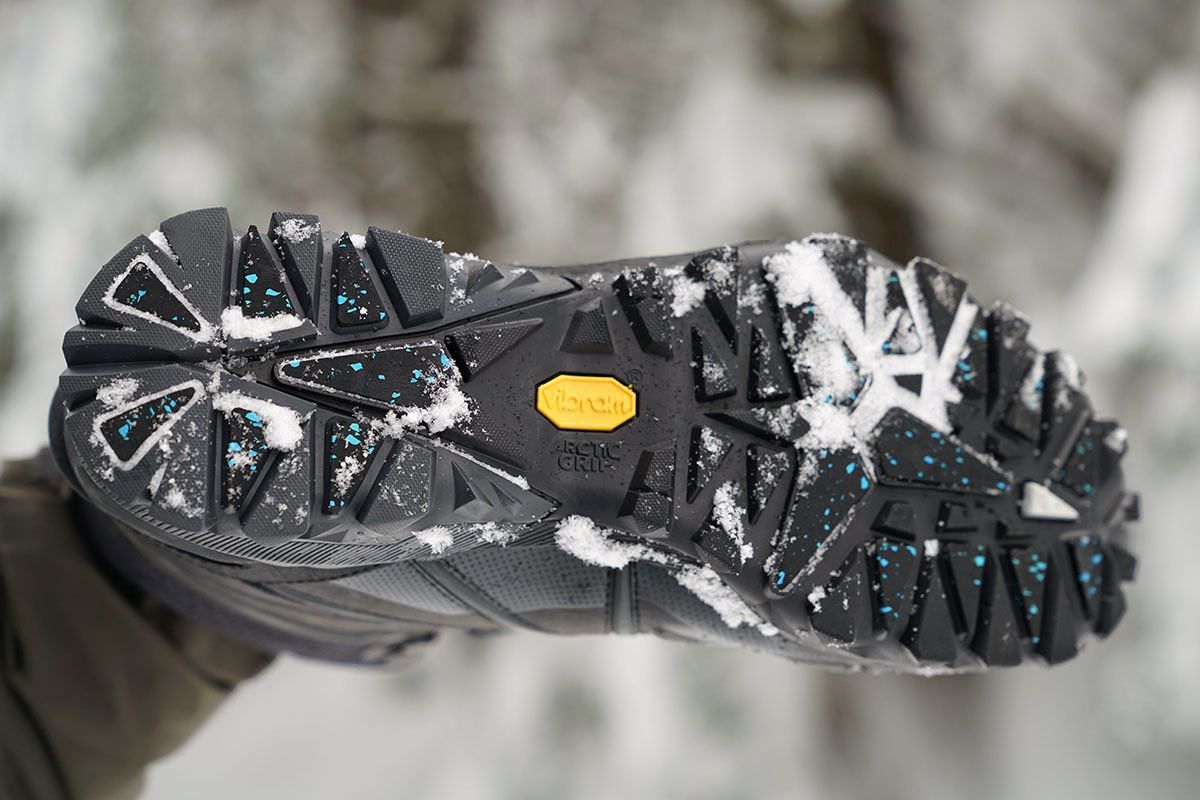
What the wear norm should be (main photo)
The sole of a shoe cannot last forever and it will definitely wear out. What is important, however, is where the wear occurs. The pattern of a healthy person's shoe shows that it is worn at the toe or heel. There is little or no wear on the exterior. However, if there are abrasions on the heel and toes and the left side of the sole is worn, this is a sign of flat feet. Many people do not pay attention to this condition, but it can lead to various problems.
During puberty, flat feet can also lead to poor posture, and this can be the start of the development of scoliosis. This happens because the soft tissues that hold the joints in the correct position are stretched too far. This leads to an abnormal redistribution of loads. This leads to back pain and all kinds of injuries. Sometimes this can also lead to persistent, severe headaches. However, an orthopedist can help solve this problem and choose the right orthopedic shoes and orthotics.
Learning the alphabet: How to get your child excited about writing
The WHO has noted signs of earlier spread of COVID in 2019.
The husband will appreciate it: a selection of stylish and cozy looks for the home
A worn heel can also indicate the early stages of flat feet. If the sole is severely worn or wrinkled, this is an indication that you should consult an orthopedist.
There is also longitudinal flatfoot. This is manifested by the formation of a thickening at the base of the big toe bone. If the thickening forms on the surface of the shoe, this indicates a serious problem. Sometimes longitudinal flatfoot develops in small children and affects them for the rest of their lives.
Shoes versus asphalt: Why do the soles wear out so quickly?
Everyone knows this phenomenon: you buy a new pair of shoes, wear them for a month or two, look at the soles and they are no thicker than a sheet of paper. And then you are spoiled for choice: repair it or throw it in the trash can. In this article we will tell you why this is the case and how you can protect your shoes and prevent the sole from washing out quickly.

Photo: pexels.com It is becoming increasingly common for the sole of a shoe to wash out quickly for various reasons:
Let's look at each cause individually.
Poor quality of materials

Photo: pexels.com
When buying shoes, pay attention not only to the quality of the upper material, but also to the sole itself. The less flexible the sole is, the faster it will wear out, because no material is as hard as the asphalt we walk on in the city most often have to run.
Rubber is one of the materials that wears out the fastest - it is too soft and has little safety reserves.
When choosing shoes, if space in the store allows, you can do a little experiment: run the edge of the sole along the floor and see if it leaves a black streak. If so, it is better not to buy such shoes, because their soles are made of very cheap materials and contain a lot of compressed soot. Such soles not only wear out quickly, but are also difficult to repair.
Waste

If you know you'll be doing a lot of walking, you shouldn't opt for lightweight shoes with a thin sole and a small heel - you need something more robust and stable. And if you wear your shoes in more extreme conditions, e.g. B. when hiking in the mountains, you should choose them carefully.
How to repair a hole in the sole of a shoe
How to repair a hole in the sole of your shoe:
- Take the insole out of the shoe.
- Press the hole closed from the inside with a small piece of leather.
- Squeeze glue into the hole. The hole should fill completely.
- Hold the leather piece in place until the glue cures. It is important that you press the adhesive area firmly together. Approximate time is 10-15 minutes.
- Turn the shoe over to distribute the glue evenly.
- Allow the glue to harden.
- Cut off the leather layer inside the shoe.
- Put the insole back in its original position.
Important: Wear gloves and a respirator when working with the glue.
You can repair damage to the shoe sole with a soldering iron.
- Wash the shoe thoroughly.
- Degrease the surface.
- Insert a hot soldering iron into the crack. This causes air bubbles to form on the surface of the material.
- Fill the hole with melted Kapron.
The leather piece method works well for a hole a few millimeters in size:
- Clean the sole from dirt.
- Treat the surface with acetone.
- Sand the sole with sandpaper.
- Cut a patch out of the leather.
- Stick the patch on the damaged area.
- Allow the glue to dry completely for several hours.
Advantages of the method – Fast, easy, cheap. Disadvantages – Short-lived (the leather quickly becomes worthless).
How do you glue a trainer toe?

How to glue a sneaker if there are holes in the sock:
- Treat the cracked area with sandpaper.
- Degrease the surface with a cleaning agent.
- Cut out the patch.
- Sand the edges of the piece with sandpaper.
- Apply glue to the surface of the trainer and the patch.
- Press the patch onto the shoe for 20 seconds (maximum time: 1 minute).
- Leave the product under pressure for 24 hours.
This method allows you to extend the life of your sports shoes for a longer period of time.
gait

Probably the most common cause of shoe sole abrasion. Every person has their own gait: some have a slight clubfoot, some are not used to lifting their feet too high off the ground, and some simply have a heavy step. In each of these cases, the shoe deforms in its own way. Therefore, there is no one-size-fits-all solution to this problem. The only thing you can do in this case is to look at where your shoes rub the most and observe your gait. Ask friends or relatives to watch you walk and gradually change your gait for the better.
Of course, in a big city environment, all footwear is subject to rapid wear and tear, but if you are more careful about the selection and comfort of your new pair of shoes, boots or boots, care for them and watch your gait, your shoes will keep you looking beautiful for much longer.
Copyright © DESIGNERS FROM RUSSIA
All rights reserved
Would you like to stay up to date with the latest releases?
Subscribe to our Telegram channel
DIY shoemaker. How to Repair a Cracked Sole – DIY – March 19 – 43419184004 – MirTesen Media Platform
- Remove dirt and cream residue from the shoes, wash them and dry them well.
- We visually inspect the unsoiled pair and check the degree of damage to the product. If the outsole has become detached from the base of the upper in several places, peel it off completely and then re-stick it.
- Fit the parts well, remove the old glue with a spatula, and degrease the surface with acetone or alcohol before gluing.
- Apply a thin layer of glue (up to 3mm) along the edges of the top and bottom pieces.
- To ensure high adhesive strength, make sure that the parts to be connected do not have any voids or are poorly aligned. Press the sole firmly onto the shoe, wait 8-10 minutes and check the adhesion.
- The shoe should then be put under pressure for at least 10 hours. This helps to equalize the thickness of the adhesive joint, evenly impregnate the surface with the compound and form a dense thin layer.
The preparation of the contact surfaces is carried out in the following order:
- dry and remove dirt, if necessary clean with sandpaper;
- degrease with alcohol (solvent, eau de cologne) and wipe with a clean, dry cloth;
- Apply the glue in one or more layers depending on the desired seam thickness and allow to dry for 5-15 minutes;
- During the day, press the surfaces together and secure them with clamps or weights.
Excess liquid should be removed immediately as this will be more difficult to accomplish later. The load that is exerted on the bonding surfaces in the first few minutes determines the strength of the connection after drying.
Glue gives off a pungent smell, so the room must be ventilated.
If the glue is chosen as recommended, the shoe will last as long as new. Don't skimp on the quality of the glue, it will more than pay for itself.
Bone in big toe
If you have this type of growth on your feet – consult your surgeon because in 2018 all these 'anomalies' will be successfully removed. But for those who, for whatever reason, do not want to undergo surgery, there is a solution - natural suede.
Why natural suede? Quite simply – it is the most durable and long-lasting material for shoes. You have to be a terrible slouch to manage to put the shoes on and wipe the suede from the inside down to the holes.
This is roughly what a piece of real leather (suede) looks like that becomes the interior patch for your sneakers.
The inner plaster should have rounded edges and a 'seamless transition' so that you do not feel it when wearing it and so that it does not pinch or pinch your foot.
The patch is stuck where it is needed. If the design of the sneaker allows it, the patch is also sewn to increase durability, but this should be agreed in advance with the craftsman so that you choose threads in the tonality of the upper. After all, no one wants to spoil the look of their shoes with colored threads that stand out from the rest.
Repairing the paragraph is done in a very similar way. The insole made of natural suede is glued and sewn to the textile lining.
Wear sneakers that are appropriate for the season so that the uppers and soles of winter models can withstand low temperatures, humidity and other harsh conditions. If you don't fully understand, send me an email and I'll explain everything to you!
How to repair the top of sneakers
How to repair the upper of a sneaker directly depends on the material used. If the shoe is made of suede, leather or synthetic leather, the material will erode over time and crack at the breaking points. Patches made of thin and flexible material can be glued or sewn onto cracked or chipped areas to restore their appearance. Peel off the old material before applying the patches.
Sticking patches on the upper of sneakers disrupts the original look of the shoe, so it is better to avoid cracks. To keep your shoes in good condition, regularly grease the leather with cream and clean the suede with a dry stiff brush, being careful to relieve tension. To remove dirt from the upper, use a damp cloth instead of running the shoe under water.
Sole repairs
The quality and condition of the sole influence how well the shoe wears. With prolonged use, the soles of your shoes become worn and lose their shape. Stepping on rocks or dirt can damage the sole and cause holes.

Holes in the sole can be repaired in different ways, depending on the base material of the shoe and the extent of the damage. The most common method for repairing holes is epoxy glue, which is relatively inexpensive and easy to use. Holes on the soles are sealed as follows:
- All edges of the hole are well cleaned and treated with a degreasing solvent;
- when the area adjacent to the defect is completely dry, apply a diluted adhesive solution;
- If the hole in the sole of the sneaker is too large, insert a fiberglass mesh to fill the cavity;
- While the glue dries, cover the damaged area with tape from the outside to align the sole;
- Allow the sneaker to dry completely in a well-ventilated area.
Restoration of a chipped sole
If the soft sole of your sneaker is slightly worn, it can be restored to its original thickness. To do this, you need to purchase microporous rubber. Cut a piece of the material into the shape of a shoe, sand the surface, and glue it to the shoe.
It's best to use a shoe-like glue to ensure a good bond.
A severely damaged sole is easier to replace with a new one. In this way, the time required to repair a damaged area can be significantly reduced. The sole to be replaced is cut from microporous rubber, as is the structure. The sneaker is applied to cardboard and its outline is traced, then transferred to the prepared material and the piece is cut out.
Why do the soles turn yellow?
The modern rubber from which shoes are made has one positive property - increased resistance to abrasion. Manufacturers for whom quality is not important allow themselves to replace good materials with plastics with poor physical properties. This is done to give the shoe additional elasticity and flexibility.
Factories add various ingredients to the rubber sole to extend the life of the product.
However, over time and under the influence of environmental influences, the original properties of the material become increasingly weaker. The first impact is the color of the sole. It can take on an unpleasant, muddy yellow color.
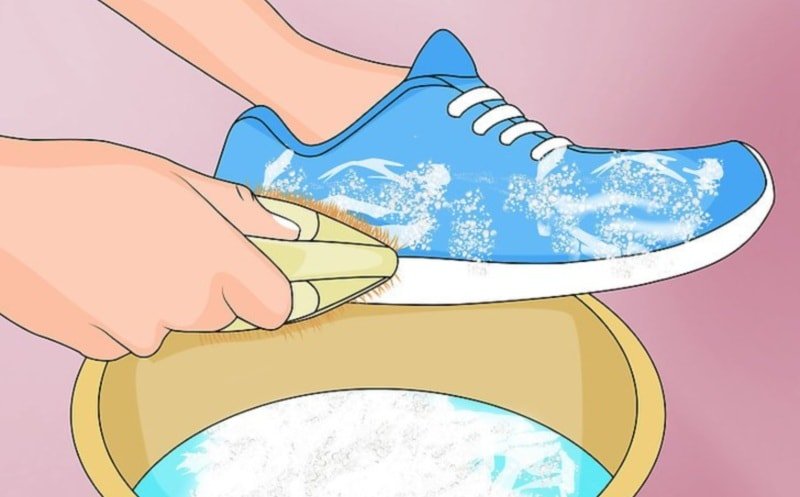
How to clean soles at home?
The effectiveness of shoe cleaning depends primarily on the material the shoe is made of. If the structure is porous, dirt penetrates better and you will have to work hard to return your sneakers or sports shoes to their original appearance. The topography of the subsoil is also important. A smooth surface will wash off much more quickly than one that has 'holes', 'channels' or 'pits'.
It is possible to make the soles of shoes that have not been worn every day for several months perfectly white again. The key to success is regular cleaning. A visit to the cleaners is most effective. With the help of professional cleaners, they can transform a pair into a new pair within a few hours. However, not everyone can afford such a service and not everyone wants to take the time to find a reliable facility. Then you can try to remove the dirt and yellowing of your shoes at home using available means.
Ineffective methods of treating slippery shoes
In addition to strange, harmful, but effective methods, there are also those that are absolutely ineffective.
Hairspray sprayed on the sole will not grip your shoes. Better to use it as intended and not waste it.
Scrubber. This method is more like torture than a way to make your shoes non-slip. It is recommended to rub the soles with a tire iron to give them a rough appearance. In reality, it is the deep tread that will protect you from ice. And a damaged sole is just an additional weak point in your shoe.
Potato. The strength is intended to prevent slipping. But firstly, it rubs off after the first few steps, and secondly, it leaves unsightly white streaks on the leather surface.
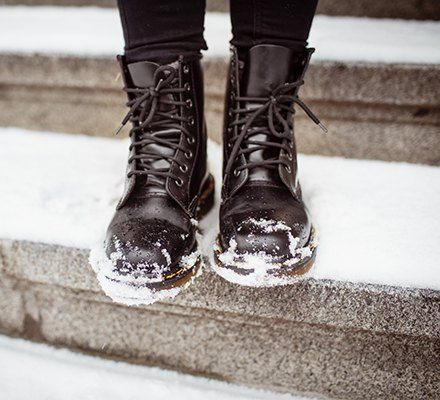
Summarized. How to make a non-slip sole in winter boots? Which shoes should you choose?
- Choose shoes with flexible and frost-proof soles with an anti-slip effect. The best material for winter soles is rubber.
- In the winter season, avoid fashionable models with stiletto heels or high heels. These can be very dangerous. The permissible heel height is up to 5 cm.
- Choose models with a wide sole that has a large contact area with the ground. To avoid freezing, it must be more than 1 centimeter high.
- A deep tread increases your chances of not getting injured in winter.
How else do I clean the white soles of sneakers and sports shoes?
The surface of the sole can be cleaned with aggressive products if gentler methods are not sufficient.
Paint remover
This product is best suited when other methods have failed to combat the dirt or when the shoes have not been cleaned for a long time.
Soak a soft cloth in acetone and wipe the dirty areas with it. Then rinse the sole well under running water.
In this way, stains caused by the interaction of the rubber with grass, diesel and normal dirt can be removed. Black streaks on the sole can also be removed with acetone.
Before you begin, do a test on an inconspicuous area of the shoe. Place a drop of the product on the surface and watch how the material reacts. Only use a white cloth as acetone can dissolve other colors and discolor the sole.
Stain remover or bleach
Every household probably has oxygen bleach or stain remover on hand. These can also be used to clean the white soles of sneakers or boots. To make the solution, add more detergent to the water than you would normally soak so it is more concentrated.
Submerge the pair of shoes in the liquid so that the water only covers the sole. Let it soak for 1-1.5 hours. Then rinse well with water.
Liquid bleach can also be applied to the sole of the pair with a sponge.
Wear gloves when working with these products. Otherwise, you will have to think about how to restore your hands to their former glory.
Acid cleaner
Acid – lemon or vinegar – can also help keep your shoes fresh.
Vinegar
Dilute vinegar in water in a 1:3 ratio.
Final tips
- Only start bleaching the soles of your shoes once all the dirt has been removed. Use gentler methods at first. Only if these don't help do you move on to harder methods.
- Only rinse your sports shoes with lukewarm water. Liquids that are too high or too low in temperature will spoil them.
- Use bleach that does not contain chlorine or alcohol. This can lead to yellowing of the sole, which can then no longer be removed.
- You will achieve better results if you replace the cloth with a toothbrush. Fluffy is easier to maneuver and gets into all those hard-to-reach places.
- The end result will depend on how quickly you can remove the dirt.
- A thin screwdriver will help you clean deeply embedded surfaces. Its tip penetrates deeper places better.
- To keep your shoes clean longer, avoid wearing them in wet, rainy weather.
- Care for your sneakers as often as possible so you don't waste time on unpleasant treatments.
If all methods have proven ineffective against dirt, you can simply color the soles with a special acrylic paint or white paint for textiles.
There are many ways to clean soles at home. However, care must be carried out in a timely manner so that you can enjoy your pair for a long time.
Read more:- What to do if the sole breaks?.
- Rubbing heel in shoes.
- The sole in the heel area has sunk in, what can you do about it?.
- Rubbing the heel.
- The sole in the shoe is responsible for.
- Damaged insoles in shoes - what to do?.
- The heel of the shoe is worn.
- Shoe sole to buy.