As part of your individual rehabilitation program, your prosthetist will teach you how to handle your prosthesis, how to put it on and take it off correctly, and the basic principles of care. Our centers will help you with repairs if your prosthesis breaks or fails.
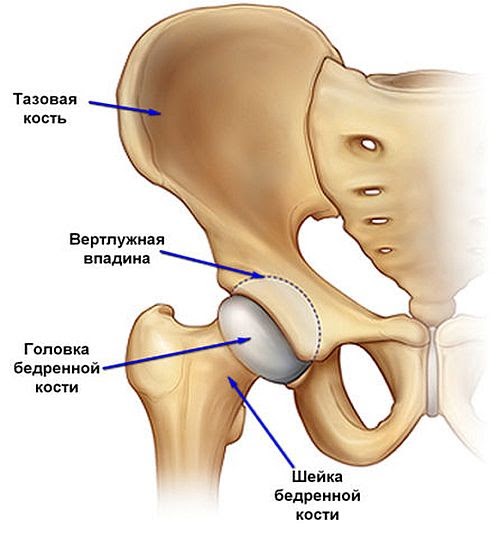
- acetabulum
- 2.Massage
- How do you get a free hip prosthesis?
- Types of hip prostheses
- mobilization
- Individual rehabilitation program
- support in rehabilitation
- Therapeutic exercises and learning to walk with a prosthesis
- Replacement of a hip stump
- What do I need to know before the exercises?
- supine position
- Briefly about a femoral neck fracture
- Causes of femoral neck fractures
- treatment options
- Hip joint orthosis for hip neck fractures
- Types of orthotics used in the treatment of SBP
- classification
- Treatment
- Advantages of Aesculap prostheses
- Types of Aesculap endoprostheses
acetabulum
Care of the residual limb after the operation
This is particularly important for patients with diabetes or vascular disease, as they are at higher risk of complications.
After the amputation, the skin of the residual limb is very sensitive. First with warm hands and later with a terry cloth glove, a soft brush or a massage ball, the increased superficial sensitivity to pain should be reduced by gently and correctly massaging the residual limb.
The direction of the massage movements with both hands is always from the end of the stump to the base of the stump, more precisely to the groin crease. The movements must be slow but rhythmic. This massage should be done several times a day for 5-8 minutes. It also helps to reduce postoperative swelling and ensures that the tissues of the residual limb are adequately supplied with nutrients.
Adequate massage reduces residual limb pain, including phantom limb pain. As a rule, after such treatment, the patient feels some relief in the stump. The massage should not be too intense, since excessive pressure on the tissues of the residual limb can increase swelling and cause the opposite of a positive effect.
Massages should not cause pain or bruising!
For daily care of the residual limb skin, it is advisable to wash it with a children's soap with a neutral pH value and dry it with a soft towel. It is advisable to combine the hygiene treatments with contrast showers on the residual limb. This helps normalize sensitivity and blood supply to the tissues of the residual limb.
Check the skin on the residual limb regularly for changes in skin condition and inform your doctor immediately if these occur.
A small hand mirror, for example, is helpful for examining the residual limb.
In most uncomplicated postoperative cases, the amputation wound will heal within three to four weeks, leaving a fine surgical scar that should be regularly moisturized with a mild cream or product recommended by your doctor. Care should be taken to ensure that the scar is soft and supple and does not stick to the surrounding tissue. Therefore, when massaging the buttocks or applying cream, special massage movements should be used carefully and gently, but only after a week, when all scabs have fallen off and the surrounding tissue has not become inflamed.
2.Massage
Start with deletions. Initially, light, superficial stroking (6-8 strokes) is used, followed by full-surface, deep hand stroking from the end of the stump to the torso (6-8 strokes).
Over time, another massage technique can be added - kneading. This is the most difficult but deepest muscle massage technique.
The next step is to move the soft tissues in the scar area in different directions. This technique is performed slowly, gently and painlessly.
Deep and superficial stroking of the soft tissues in the scar area. The scar itself is approached slowly and carefully without stretching the tissue too much.
The soft tissues are moved around the end of the residual limb while maintaining the mobility of the soft tissues in relation to the bony component.
Then use your thumbs to spread the soft tissues of the scar area in a spiral motion on each side of the scar.
Particular attention should be paid to the volar and internal surfaces of the residual limb and the overlying segments, as these are where the main drainage pathways for lymph are.
The fingertips are then rubbed along the muscles in a spiral pattern. The movements are slow and apply even pressure to the tissue.
An important problem to deal with in a timely manner is the swelling that occurs after the operation as the body's natural reaction to the procedure. If the postoperative course is uncomplicated, most swelling will subside after three to four weeks.
However, it is worth considering that the stump will continue to lose volume for another year or two.
To reduce postoperative swelling, it is important to raise the residual limb to a slightly elevated position for 20-30 minutes several times a day, so that the distal end is higher than the proximal end. In the same position, tense the muscles of the stumps at intervals of 3-5 seconds - to further improve blood and lymphatic drainage.
The lymph drainage massage or elements of it can also be used to reduce swelling. The lymphatic drainage massage on the residual limb can be continued until the edema has completely subsided. If necessary, other muscle groups can also be massaged at the same time, e.g. B. back, lumbar spine, buttocks and shoulder girdle.
Positioning treatment should be combined with measures to prevent and treat contractures in the surrounding joints (see below).
Swelling is also reduced with compression therapy, which improves blood flow to the residual limb, relieves phantom limb pain in many patients, and generally speeds tissue healing. Compression cords and elastic bandages are recommended for this purpose.
Bandaging is the most accessible treatment, so let's look at it in detail. However, the bandage tension should remain the same throughout the bandaging process,
the dressing should be rotated more at the distal end of the stump. The degree of compression at the end of the residual limb is then greater, which should also be achieved.
Bandaging of the residual limb can be started with doctor's approval. Before bandaging, a procedure can be performed in which the stump is placed in an elevated position for 20-30 minutes.
The bandaging should not be painful. If pain does occur, remove the bandage, examine the residual limb and, if everything is fine, re-bandage the residual limb after a short break. If the residual limb turns blue or purple, the previous bandage was too tight and you should wait until the physiological skin color is fully restored before bandaging again. The bandage should therefore not cause pain or significant discoloration of the skin.
How do you get a free hip prosthesis?
A Russian citizen with a disability is entitled to a free high-quality hip prosthesis. First, a medical-technical opinion is obtained from the orthopedic center to prepare the prosthesis and choose the right option. A medical and social report is then drawn up to confirm the disability. In this phase, an individual rehabilitation program is developed. Once you have registered with the STF, you can choose how you would like to receive your prosthesis:
- Through compensation. You sign a contract with the manufacturer for a prosthesis, choose the components you need and the shape. Once you have received and fitted your prosthesis, submit a claim for reimbursement to the STF. The advantages of this method are shorter waiting times and the ability to choose the desired features of the product;
- With a state contract – You apply for the prosthesis and the necessary documents at the STF. The tender for the production takes between 2 and 12 months. The payment is made at the expense of the state. The disadvantage of this method is that the waiting time can be up to a year.
Our specialists will advise you on thigh prostheses and help you prepare the documents.
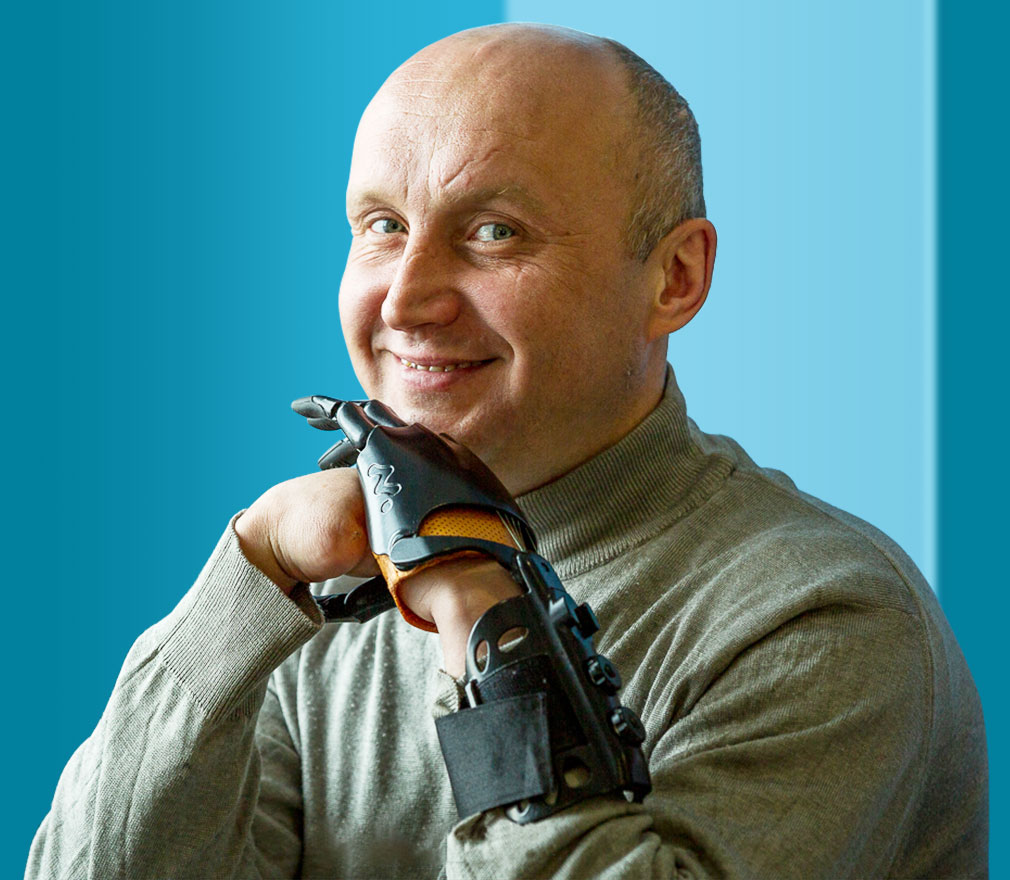
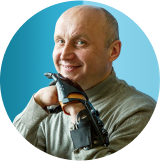
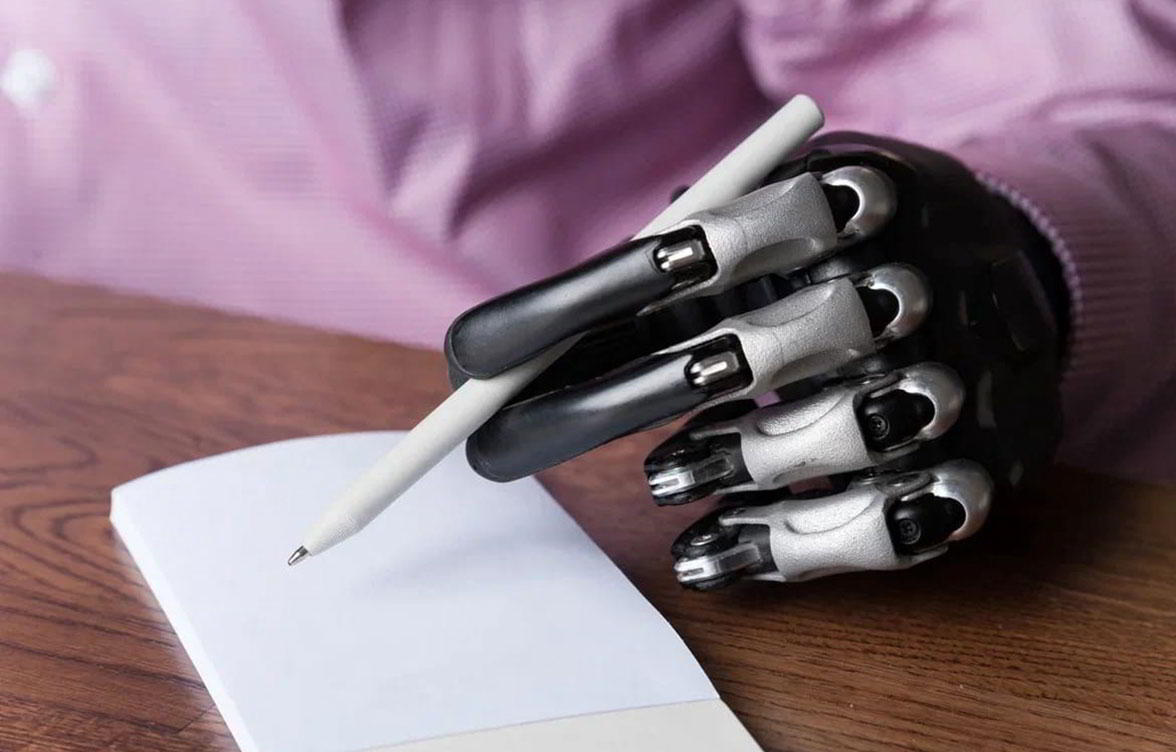
Ivan turned to our prosthesis center, and thanks to the support of the Buryatia Social Insurance Fund, his dream came true. He received modern prostheses for both arms free of charge and thus full legal and medical support.
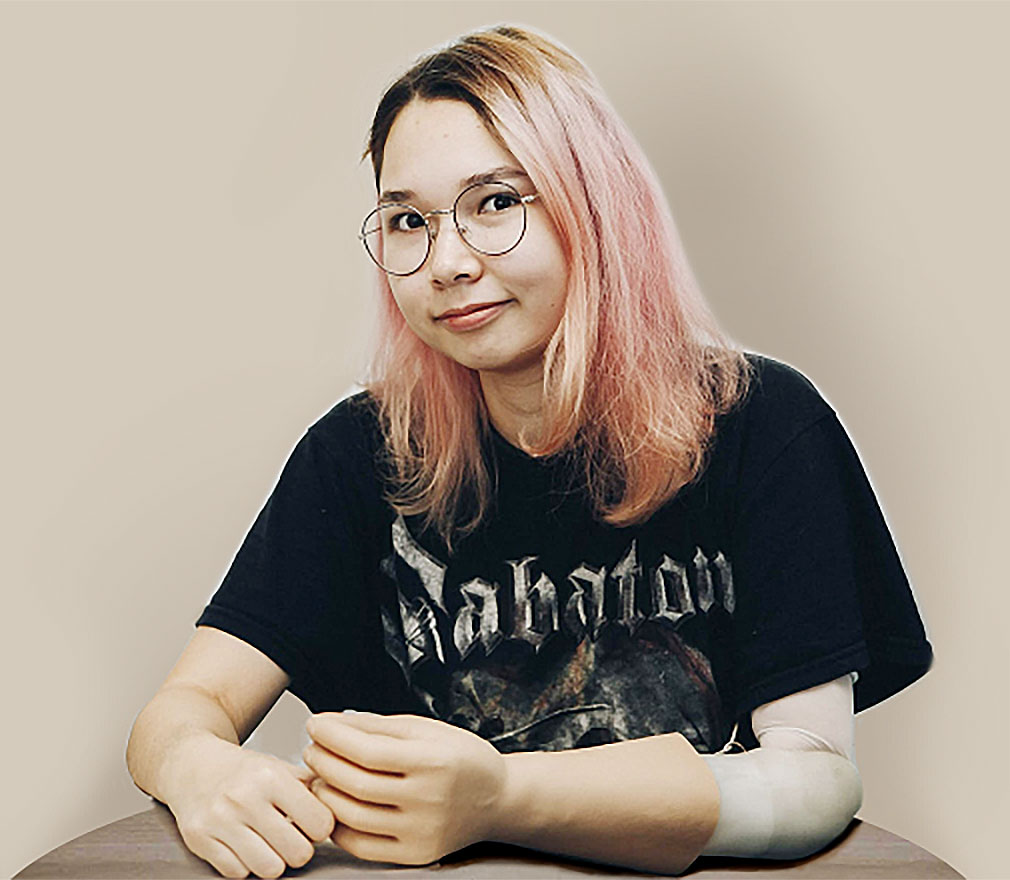
The girl was born with congenital forearm aplasia. We were able to make a special bionic prosthesis for her. Alina now controls them with muscle impulses.

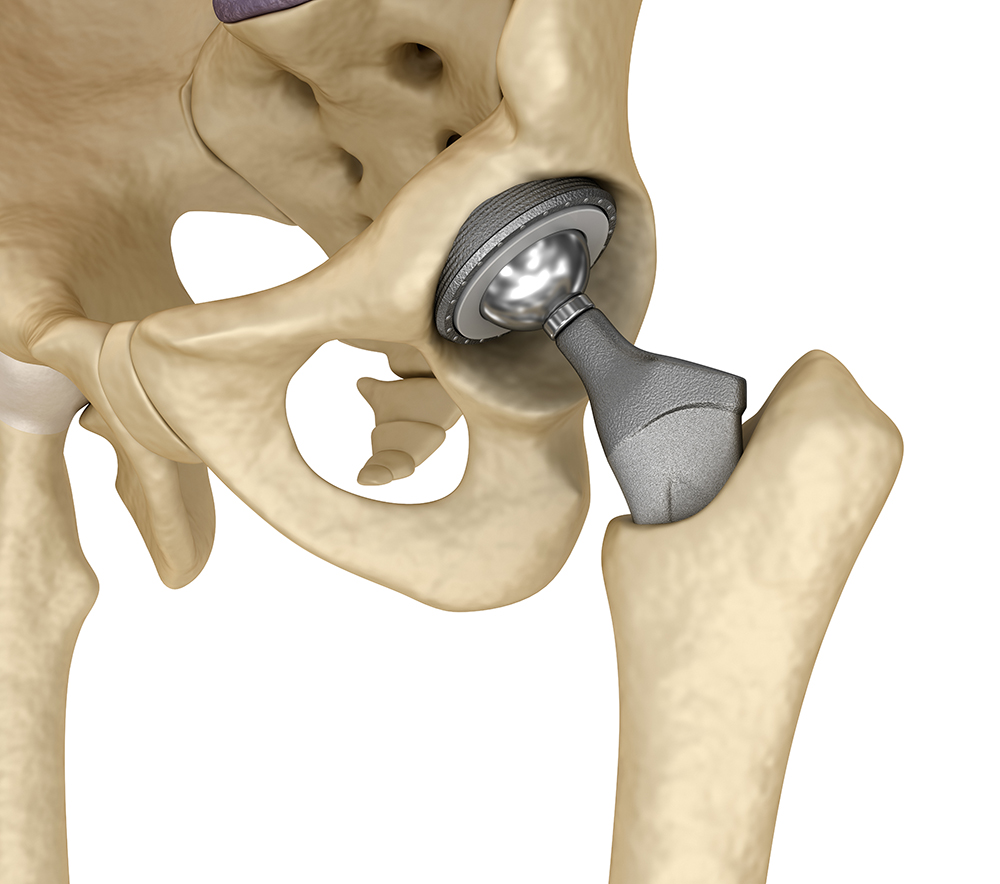
Types of hip prostheses
The model of the prosthesis is selected depending on the age, weight and gender of the person. The trauma surgeon takes into account your daily physical activity. Elderly people with a sedentary lifestyle, for example, do not need complex bionic construction. As a rule, such models are chosen by athletes or people who are used to heavy loads.
- Modular – consisting of a residual limb and a knee module. The shaft is securely fixed with the help of a vacuum. A spring mechanism ensures that the structure can move. The model is stable, comfortable to wear and allows mobility of the knee and lower limbs;
- Therapy and training models – for the first stage of prosthetics. They are prescribed after the operation when the residual limb has healed. They serve to get the patient used to wearing the prosthesis;
- Bathing models – for procedures in the water. The surface of the foot is non-slip, the components are corrosion-resistant and will not be damaged when exposed to chlorine or soapy water;
- Bionics – products with different types of sensors and microprocessors, suitable for intensive exercise and sports.
When making a leg prosthesis at hip level (hip prosthesis), Salut Ortho specialists recommend selecting the desired knee module, foot, socket option and type of attachment.
When choosing accessories, they take into account the doctor's recommendations and the individual characteristics of the patient (height, weight, age), as well as his physical and social activities.
If the rhythm of life has changed and the old prosthesis can no longer cope with the load, it is worth thinking about a replacement. You can assess the functionality and comfort of your knee or foot module during a test drive. Replacement covers and high-quality silicone inserts are available at any time.
mobilization
The second important area of postoperative rehabilitation is patient mobilization. The removal of the limb affects balance: the weight on the operated side is reduced, the center of gravity shifts, the limb no longer has support and the feeling of the deep nerves is lost. There is a redistribution of load and function.
In an effort to be as comfortable and pain-free as possible in bed, patients drastically reduce their activity levels. However, this only exacerbates the development of contractures - a permanent restriction of movement in the joints with subsequent scarring of the tissue.
During stump formation, it is advisable to use a firm mattress to sleep on and a firm pillow for the wheelchair seat. This prevents excessive flexion of the joints and deformation of the spine by shifting the center of gravity.
Constant bending of the residual limb is strongly discouraged. For transfemoral amputations, it is advisable to lie on your stomach with your head toward the stump for about 30 minutes, two to three times a day to stretch the muscles. While lying on the sound side, it is advisable to pull the stump backwards.
In the first days after the operation, with the doctor's approval, special exercises should be performed to maintain joint mobility and muscle tone.
- Lie on your stomach on a flat surface and bring the amputated leg and sound leg closer together. Turn your head towards the sound leg. Raise the amputated leg as high as you can, count to 10, and then slowly lower it. Be careful not to swing the leg from side to side.
- Lie on your back on a flat surface, bend your good leg at the knee, and place your foot on the surface. Straighten the amputated leg. Without bending the knee, raise the amputated leg up to the knee of the sound leg, hold this position and count to 10. Without bending the knee, lower the leg.
- Lie on a flat surface, bend your good leg at the knee and place your foot on the surface. Extend your arms along your torso. Raise your pelvis as high as you can, hold this position, count to 10 and slowly lower yourself. Don't bend the stump, pull it down.
- Lie on your side with the amputated leg up. Raise the amputated leg to a 45-60 degree angle, count to 10, and then slowly lower it. During the lift, the head, body, and other leg should remain parallel to the floor level and in line.
- Lie on your side with the amputated leg down. Place the foot on the thigh of the amputated leg for support. Firmly lift the amputated leg up, without tilting it forward or backward, and hold it in that position while counting to 10. Slowly lower the leg. If the leg is amputated below the knee, keep it straight.
- While seated, spread your legs by pulling a towel over your hips and count to 10.
- While seated, place the pillow between your thighs and squeeze, counting to 10.
Individual rehabilitation program
An IPR – Individual Rehabilitation Program is required for the prosthesis and further compensation for the services of the prosthetist. With it, it is possible to learn to walk with a hip prosthesis free of charge, that is, with the help of a rehabilitator. In addition, a range of social rehabilitation measures are recommended for the disabled person to help them reintegrate into the community.
support in rehabilitation
Learning to walk with a hip prosthesis is accelerated with the support of a rehabilitation therapist. The first steps are taken on parallel bars to make the patient feel more secure. The doctor guides the patient and corrects mistakes. He teaches the correct posture of the trunk and the pelvis.
The physical therapist also teaches how to safely descend and climb stairs or an incline. He teaches how to get up after a fall.
A person feels more secure when supported by a knowledgeable therapist. In the first sessions, the rehabilitation therapist hardly leaves the patient's side. He demonstrates how to walk with a prosthesis after a hip or lower leg removal. Once the person feels safe, the doctor allows them to move around and do exercises on their own. In addition, the specialist shows coordination exercises and strengthens the muscular corset.
Therapeutic exercises and learning to walk with a prosthesis

Well-trained muscles help to control the prosthesis better. Not only the muscles of the residual limb play a role, but also those of the back, buttocks and abdominal muscles. It is therefore important that the disabled person does not stop moving.
Strength exercises are performed with your own body weight or with small weights. Coordination exercises can be carried out with various devices, e.g. B. steps or volleyballs are carried out. At the beginning of rehabilitation you should exercise once a day, in the middle of the process several times a day.
The starting position is the back, side or stomach position. If the patient shows good results, the rehabilitation doctor will quickly adjust the program and add standing or sitting exercises.
Replacement of a hip stump
When preparing for a thigh stump prosthesis, the length of the lever arm is calculated based on the length of the thigh. The diaphyseal part, i.e. the tubular bone distal to the fibula, is the measure for the leverage.
Also important for the transfemoral residual limb is the ability to fully load the residual limb. Typically, this ability is reduced by around 20-30 % in such a situation. The small cross-sectional dimensions of the long bone allow only a partial axial loading of the prosthetic leg. Also, the soft tissues in this area are pre-stretched during insertion while the residual limb is pulled into the acetabular cup with a valve and stocking.
In the case of ultra-short femoral residual limbs, there is usually nothing left of the femoral diaphysis. The amputation line runs through the spongy bone of the acetabulum. The same principles apply to the prosthesis as to amputations in the hip area. However, this ultra-short stump forms an important part of the seating surface and must therefore be preserved as much as possible.
Since the femur is naturally surrounded by a more or less pronounced soft-tissue mass, the butt end should also be covered by muscle, avoiding excessive thickening, which is common after myoplastic surgery. If the muscles are poorly seated in the socket of the prosthesis, they will twist when standing and the femur will be punctured by the soft tissues. The sciatic nerve crosses at least two inches above the shoulder blade while protecting it from the mechanical pressure applied to the residual limb.
Only the protruding greater trochanter remains poorly hidden - it is only covered by skin and tendons and is therefore inserted particularly precisely and carefully into the shaft of the prosthesis. The latter is probably the only structure today capable of absorbing additional forces beyond the joint. While it would be a serious mistake to extend the prosthesis socket beyond the hip joint after disarticulation at the knee joint, amputations performed through the tubular femur eliminate the need for additional pelvic support during prosthesis. Due to the anatomical structure, the transmission of the axial forces to the terminal segment of the residual limb is only partially possible and barely reaches 30 %. Suitable mechanical conditions are created in the pelvic area for the remaining flap.
What do I need to know before the exercises?
The first few times the patient should do the exercises on their back. As he begins to feel better, the list of recovery exercises will expand. Then the exercises can be performed on the abdomen, sitting and on the healthy side.
Maximum exercise should be performed to prepare the residual limb for walking and the prosthesis. The stump must be prepared and strong.
For this purpose, exercises are performed with isometric contraction of the necessary muscles. Depending on the degree of amputation, the list of exercises may also vary.
Phantom impulse exercises, which are a subset of therapeutic exercises, are performed several times a day for periods of 10 minutes or more. The exercises should be done for the rest of your life.
Here is a list of effective exercises after a limb amputation:
- pelvic raises (4-8 times);
- cycling (10 movements with each leg);
- hip stretching with fitness bands (10 times);
- Side Scissors (10 times);
- diagonal (on the stomach – 4 times per side);
- Hip stretches and abdominal scissors.
Giving up physical therapy is not a wise decision. It is worth doing them immediately to speed up the prosthesis.
supine position
This is the recommended exercise series for supine lower limb amputation and can be performed in the first to fourth week after surgery.
Exercise 1 pelvic floor raise
The starting position is standing with the remaining leg on the foot. Count: 1 – raise the pelvis towards the ceiling while resting on the heel, keep both hips parallel to each other and tighten both glutes, 2-3 – hold this position, 4 – return to the starting position. Repeat the exercise 4-8 times.
Mimic the movements of cycling. Perform 6-10 movements first with one leg, then with the other leg.
Exercise 3 'Hip Stretch'.
Starting position: Wrap thighs with an elastic band or wrap a long towel into a loop.
Count: 1 – spread your hips and slide your buttocks on the surface, 2-3 – hold this position
Briefly about a femoral neck fracture
The femoral neck is a sort of 'bridge' between the femoral head and its main shaft, which in turn is part of the hip joint. Mobility of the joint is provided by the insertion of the femoral head into the acetabulum of the hip bone, and much of the stress on the hip joint falls on the femoral neck.
The hip joint is considered one of the strongest joints in the human body, but it is not immune to injury.
Causes of femoral neck fractures
The main causes of SBP are systemic diseases that disrupt bone metabolism and gradually reduce the strength of the bone shaft, making the femoral neck brittle and even breaking under its own weight.
Most commonly, SBP is caused by untreated osteoporosis, a metabolic disease in which the bone renewal process is disrupted, resulting in loss of bone strength.
Another cause of SBP is obliterative arteritis, or atherosclerosis, of the medial artery around the femur. This cuts off the blood supply to the femoral head and neck, leading to gradual destruction of the femur.
Since both diseases tend to develop in old age, more than 90-95 % of femoral neck fractures occur in people over 65 years of age.
treatment options
The main problem with the self-healing of the femoral neck lies in the human anatomy: the fracture usually occurs at an angle of more than 30º, which greatly displaces the bone fragments, making healing difficult. Therefore, surgical intervention is always recommended for SBP and can be performed in two main ways:
- osteosynthesisOsteosynthesis: The femoral neck is anchored with a pin, spikes or a medical screw.
- endoprosthesis: The femoral neck and femoral head are replaced with a metal prosthesis.
Hip joint orthosis for hip neck fractures
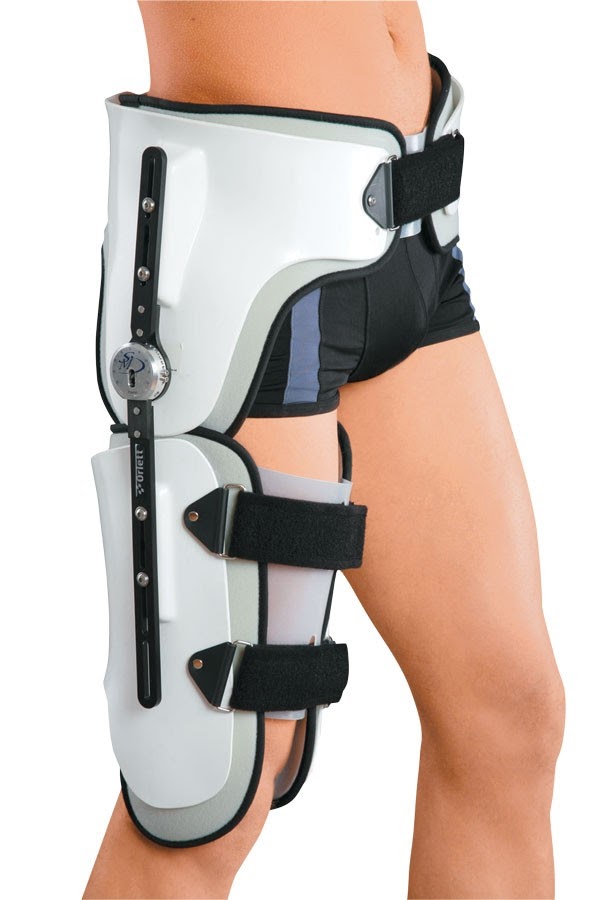
A hip brace is a special orthopedic device that helps keep the hip joint in a specific position throughout rehabilitation after an injury.
The use of an orthosis for a hip fracture has the following advantages
- The orthosis is easy to put on and, if necessary, very easy to take off again;
- the lower weight of the product (compared to a cast shoe') reduces the stress on the joint;
- adaptability to the size of the hips;
- Adjusting the allowable range of motion of the joint during patient recovery;
- Internal padding for greater comfort and hygiene and some protection against pressure sores.
Types of orthotics used in the treatment of SBP
In the conservative treatment of PZT, only rigid orthoses are used to completely immobilize the joint. Once the fracture has healed, the orthosis can be replaced with a soft support bandage, which will help loosen the still sensitive joint.
Hip orthoses with a rigid design can be roughly divided into two sub-types depending on their mode of action (although in most cases both properties are combined in one product):
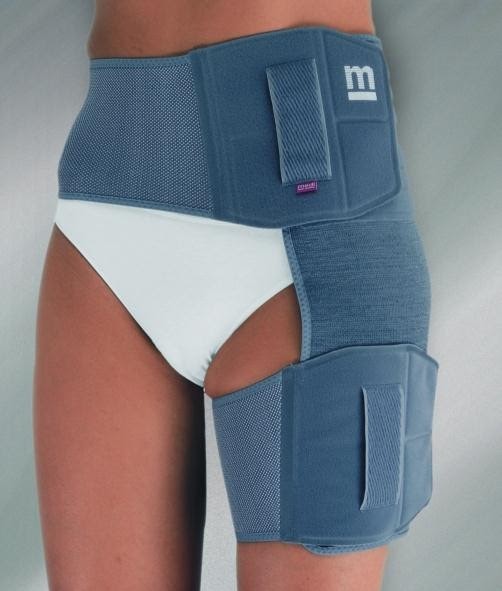
- fixation: They should fix the joint firmly and prevent dislocation as much as possible.
- retractors .Positioning : allows setting the desired angle of deviation, which can be useful in the initial phase of rehabilitation after the fracture has healed.
In addition, hip orthoses can be unilateral or bilateral. Unilateral braces consist of two plates that attach to the patient's hip and waist to prevent flexion of the leg at the hip. Bilateral orthoses attach to both of the patient's hips and prevent the hip joint from swaying from side to side.
classification
Diagnostic Criteria
Complaints and medical history: History of a pathological dislocation, severe suppurative process in the first half of the first year of life. Prolonged hospitalization, puncture or spread of an abscess in the hip region.
Physical examination: Gait disturbance (lameness or 'duck gait'), instability of the hip joint, lateral and superior displacement of the greater trochanter, restricted movement of the hip joint, limb shortening in unilateral lesions. Presence of a fistulous scar in the hip joint region.
Laboratory tests: No changes in clinical and biochemical tests in the absence of concomitant pathology.
Instrumental examination: X-rays of the hip joints show lateral displacement of the femoral head, part of the head remains uncovered by the roof, Shenton's line is disturbed, the head is deformed (with subluxation). The femoral head is elevated into the ala of the ilia, into a newly formed acetabulum that lies proximal to the original acetabulum. The head is deformed and reduced in size. The outer edge of the acetabulum is oblique and the acetabulum is flat (when dislocated). The stump of the femoral neck lies on or over the outer edge of the acetabulum (pathological dislocation).
Indications for consulting a specialist:
– ENT doctor, dentist, for the rehabilitation of infections of the nasopharynx and oral cavity;
– In case of ECG abnormalities – consultation of a cardiologist;
– In the presence of an ECG – pediatrician;
– In viral hepatitis, zoonotic, intramammary and other infections – an infectious disease specialist;
– in case of neurological pathology – a neurologist;
– in case of endocrine pathology – an endocrinologist.
Minimum tests for hospital referral. 3:
3. Test for HIV, hepatitis in case of previous surgical interventions.
Treatment
Treatment goals: Restoration of load-bearing capacity of the lower limbs through open reduction, extra-articular corrective osteotomies, palliative reconstructive interventions.
Non-drug treatment: Diet in the absence of concomitant pathology – depending on age and physical needs. The treatment modality for 1.5-2 months is bed rest followed by walking on crutches. Throughout the treatment period, the child receives orthopedic adjustments.
(1) Antibiotic therapy in the postoperative period from the first day – 2-3 generation cephalosporins and lincomycin in an age-appropriate dose for 7-10 days.
2. Antimycotics - Mycosyst once or Nystatin in an age-appropriate dose - 7-10 days.
3. Analgesic treatment in the postoperative period from the first day (Tramadol, Ketonal, Trigan, Promedol) depending on the indication for 3-5 days.
4. in postoperative anemia – iron preparations (Actiferin, Ranferon, Ferrum lek) to normalize blood parameters.
5. to prevent hypocalcemia (calcium gluconate, Calcium-Dz Nicomed, Calcid, Osteogenon) orally from the 7th to 10th
6. Transfusion of blood components (SPP, monogroup erythrocytes) intraoperatively and in the postoperative period as indicated.
Preventive measures: Prevention of bacterial and viral infections.
1. Prevention of contractures and joint stiffness.
Aftercare: The aim is to restore the functional range of motion in the operated hip joint. 14-18 days after open reduction surgery or 1-1.5 months after extra-articular surgery, rehabilitation treatment of hip and knee joints (physical therapy, physiotherapy, massage, heat therapy, BMC).
1. Antibiotics – 2-3 generation cephalosporins, lincomycin
2. Antifungals - Mycosyst, Nystatin
In addition to the risks associated with any surgical intervention (risk of anesthesia, nosocomial infections), the following complications may occur:
- Risk of dislocation: This is a serious complication for the patient and varies over time. The risk of dislocation is particularly high in the first few months after the operation and then decreases after the first year. However, over time it slowly increases again. A dislocation can be caused by various factors related to the patient, the surgery and prosthesis, or post-surgical care. After the first dislocation, the risk of recurrence is much higher.
- Risk of infection: Any surgical procedure carries a risk of infection, but having a prosthesis put in increases the risk as a foreign object enters the body. The immune system becomes destabilized and a localized area of immunodeficiency may develop. A bacterium that normally cannot survive can grow on this foreign body. The risk of infection is higher in older people because the defense mechanisms of the immune system are less effective. Other factors such as obesity, which makes surgery difficult, diabetes, which weakens the immune system, and smoking can increase the risk of infection.
- Allergy risk: There is a risk of an allergic reaction to some of the materials used in the prosthesis.
- Risk of reoperation: Malfunction, wear or tear of the prosthesis can lead to reoperation.
Type of hip prosthesis: which hip prosthesis for which patient?
The choice of the type of hip prosthesis depends on the patient's age, the anatomical features of the joint, body weight and also on the patient's wishes.
A ceramic sliding pair is best in terms of wear because ceramic has high rigidity and a low coefficient of friction. However, like glass, ceramic is also fragile. In the event of a fall, which can happen to any patient, the prosthesis can break into many pieces that are difficult to remove from the tissues.
Advantages of Aesculap prostheses
By using Aesculap implants, it is possible to regain full mobility of the damaged joint. The implants do not affect muscle fibers, tendons or blood vessels.
Key features of Aesculap products
Increased wear resistance allows for much less frequent replacement of the prosthesis than with inferior products. The material does not trigger any allergic reactions in patients. After the operation, joint mobility is restored as soon as possible.
Types of Aesculap endoprostheses
The company's products are divided into different categories based on their function.
- reconstructive systems. These include artificial joints used in hip arthroplasty.
- Partial replacement. The implants are used in knee joint surgery and for reconstruction of the knee structure.
- Systems for the treatment of fractures of the shoulder and hip. Using pens will heal damaged areas and restore functionality.
The company's products are able to completely replace the damaged joint, even if the bone structure is very weak. Aesculap endoprostheses restore mobility when other prostheses have failed. The innovative development of the various shells significantly reduces wear and tear on the prosthesis. Numerous tests are carried out during the manufacture of each implant in order to reduce the friction of the parts.
Aesculap® endoprostheses can be purchased at the Bosti branches in Bishkek, Osh and Jalalabad. All Aesculap® products can also be ordered throughout Kyrgyzstan.
If you have any questions about hip arthroplasty, you can contact a BOSSTI doctor on 0551717713 - we look forward to hearing from you!
Read more:- blunt.
- What to do with amputated limbs?.
- Limb amputation.
- prosthetic legs.
- Leg prosthesis below the knee.
- The reamputation is.
- prosthetic leg.
- Life after a leg amputation.